Have you ever had a circuit breaker trip, cutting power to a room or your whole home? It might seem like a small issue, but bad or old circuit breakers can be dangerous. Replacing a circuit breaker is easier than you think. We’ll show you how to do it safely and right, from spotting problems to installing the new one.
Safety Precautions Before Starting Electrical Work
When you’re doing electrical wiring repairs or diy home improvement projects with electricity, safety comes first. It’s key to avoid accidents and keep your home safe while working.
Required Safety Equipment and Tools
Before you start, make sure you have the right safety gear and tools. You’ll need:
- Rubber-soled shoes or a rubber mat to prevent shocks
- Rubber-insulated tools like screwdrivers and pliers for safe handling
- Voltage tester to check if the power is off
- Insulated flashlight for good lighting
- Safety goggles to protect your eyes from sparks or debris
Proper Grounding Techniques
Grounding is vital in electrical wiring repairs. Make sure the area is dry and your hands are dry too. Also, stand to the side when turning off circuit breakers to avoid sparks.
Emergency Procedures
Have a plan ready for emergencies. Keep a backup light source, like a flashlight or lantern, in case the power goes out.
Remember, safety is the most important thing when working with electricity. By taking these precautions, you can reduce the risk of accidents and complete your diy home improvement project safely.
Identifying Signs of a Faulty Circuit Breaker
Homeowners rely on circuit breakers for safe electrical systems. Over time, these components can wear out. It’s important to spot signs of a faulty circuit breaker to avoid bigger problems.
Frequent tripping is a common sign of trouble. If your breaker keeps shutting off power, it might be overloaded or short-circuited. Also, strange buzzing or clicking sounds from the breaker box could mean wear and tear.
Visible corrosion or damage on the breaker or wiring is another warning sign. Discoloration, melting, or a burning smell can mean a fire hazard. If the breaker or outlets feel hot, it’s a clear sign of a problem.
The age of your circuit breakers is also important. Modern breakers last 30-40 years. If yours are older, it might be time for a new one, even if they seem fine.
To diagnose a faulty circuit breaker, get a licensed electrician. They use tools like multimeters and thermal cameras. They can tell you if you need a reset, repair, or a new one.
Watching for signs of a faulty circuit breaker, we can fix problems early. This keeps our homes safe and our families protected. Always put safety first when maintaining your home.
Essential Tools and Materials for Circuit Breaker Replacement
Replacing a circuit breaker is a key electrical task. It needs the right tools and materials. Our circuit breaker installation guide will show you what you need for safe and successful work.
Specific Tools Required
To replace a circuit breaker, you’ll need these tools:
- Rubber-insulated screwdrivers
- Insulated pliers
- Multimeter voltage tester
- Flashlight
- Safety glasses
Choosing the Right Replacement Breaker
Choosing the right circuit breaker is key. Make sure it matches the brand, type, and amperage of the old one. Look at the labels to find the correct replacement. Using the wrong type can be dangerous.
Additional Supplies Needed
You’ll also need some extra supplies for your circuit breaker installation guide:
- Wire nuts
- Electrical tape
These items help keep electrical connections safe and secure during installation.
| Tool/Material | Importance | Estimated Cost Range |
|---|---|---|
| Rubber-insulated Screwdrivers | Safely handle live electrical components | $10 – $30 |
| Insulated Pliers | Grip and manipulate wires and circuit breakers | $15 – $40 |
| Multimeter Voltage Tester | Verify power status and check for electrical issues | $20 – $50 |
| Replacement Circuit Breaker | Provide overcurrent protection for the electrical circuit | $5 – $50 (depending on amperage and brand) |
| Wire Nuts and Electrical Tape | Secure and insulate electrical connections | $2 – $10 |
Locating Your Main Circuit Panel
First, find your main circuit panel for any electrical work. It’s usually in the basement, garage, or utility room. It might be hidden behind a metal door, so get to know its layout and labels.
The main circuit panel is the heart of your home’s electrical system. Each breaker controls power to different parts of your home. Knowing the panel’s layout helps you fix electrical problems and keep your home safe.
| Residential Main Breaker Panel Sizes | Typical Usage |
|---|---|
| 100 amps | Smaller homes or older homes |
| 200 amps | Modern homes with increased electrical demands |
| 225 amps | Larger homes or homes with significant electrical upgrades |
| 400 amps | Larger homes with extensive electrical requirements |
Many homes now have 200-amp panels. This upgrade meets growing electrical needs and boosts your home’s value.
Proper Power Shutdown Sequence
Before you start to replace a circuit breaker, make sure your home’s electrical system is turned off. This is key for your safety and the quality of the electrical work. We’ll show you how to shut down the power and check if it’s off.
Main Power Disconnection Steps
- Find your home’s main circuit panel, usually in the basement, garage, or utility room.
- Turn off each branch circuit breaker one by one.
- After all branch breakers are off, shut off the main circuit breaker.
Verifying Power Status
After turning off the main breaker, you must check if the electrical panel is really off. Use a voltage tester to do this. Never skip this step without checking with a tester. It’s a simple way to avoid serious harm or death.
Following these steps and checking the power, you can safely work on replacing the circuit breaker. This is important for keeping your home safe and avoiding future electrical wiring repairs.
How To Replace A Circuit Breaker
Replacing a faulty circuit breaker is easy and can save you money. It’s better than calling an electrician. If your breaker keeps tripping or you want to upgrade your electrical system, follow these steps. This will help you replace the breaker safely and well.
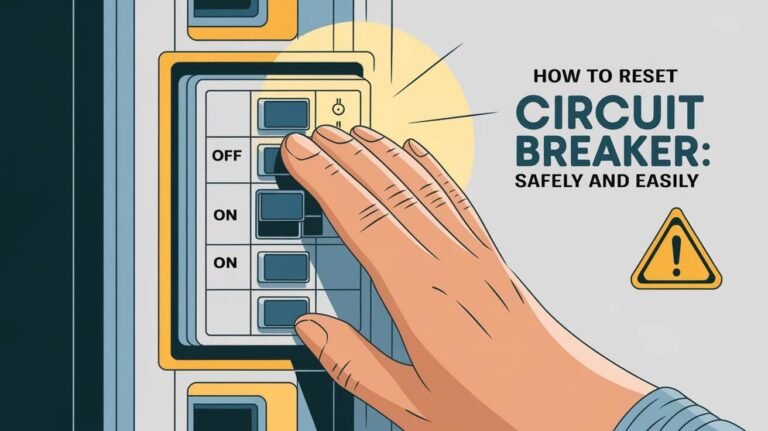
- Turn off the power. Find the main circuit breaker and switch it to “off”. This cuts power to the whole panel.
- Remove the panel cover. Unscrew the panel cover and set it aside. Be careful not to damage any wiring or parts.
- Identify the faulty breaker. Look at the circuit breaker panel and find the breaker that needs to be replaced.
- Disconnect the old breaker. Use a flathead screwdriver to disconnect the wires from the faulty breaker. Note their positions for later.
- Remove the old breaker. Unscrew or unhook the old breaker. Then, carefully remove it from the panel.
- Install the new breaker. Put the new breaker in the right slot and snap it into place. Make sure it’s securely mounted.
- Reconnect the wires. Reattach the wires to the new breaker. Make sure they’re connected to the right terminals.
- Test the new breaker. Turn power back on to the panel. Test the new breaker by turning it on and off. This checks if it’s working right.
Always follow safety rules when working with electrical equipment. Wear rubber-soled shoes and use insulated tools. If you’re not sure you can do it, it’s best to get a licensed electrician. They can make sure the job is done safely and right.
| Metric | Value |
|---|---|
| Average cost to replace circuit breaker with an electrician | $100 – $200 |
| Average cost of DIY circuit breaker replacement | $5 – $20 |
| Percentage of circuit breaker boxes with signs of wear or damage | 72.1% |
| Percentage of circuit breaker replacements due to overloading | 57.9% |
| Percentage of circuit breaker failures due to wear and reduced capacity | 68.3% |
Removing the Panel Cover Safely
When it’s time to replace a circuit breaker, the first step is to safely remove the panel cover. This is a crucial process that requires careful attention to avoid potentially dangerous situations. Let’s explore the proper guidelines and techniques for handling the panel cover during this electrical panel upgrades project.
Panel Cover Handling Guidelines
Start by removing the screws that secure the panel cover, beginning with the corner screws. As you remove the screws, hold the cover firmly to prevent it from falling and potentially causing damage or injury. Once the last screw is taken out, slowly and gently lower the cover, being mindful not to let it touch any internal components.
Wire Management Tips
With the panel cover now exposed, it’s time to manage the wires neatly. Avoid allowing the wires to come into contact with other wires or metal parts, as this could lead to short circuits or other electrical hazards. Carefully organize and secure the wires, ensuring they are out of the way and won’t interfere with the circuit breaker replacement process.
Following these safety guidelines and wire management tips during our diy home improvement projects, we can successfully and confidently remove the panel cover without incident. This sets the stage for the next step in the circuit breaker replacement journey.
Disconnecting the Old Circuit Breaker
Replacing a faulty circuit breaker is key to keeping your home’s electrical system safe and efficient. Before installing the new one, you must disconnect the old. This involves several steps that need careful attention and safety measures.
First, extend the black insulated circuit wire from the panel sides. Hold the old breaker at its center and pivot it out. Then, unscrew the wire from the breaker terminal. For 240-volt breakers, you’ll need to disconnect both hot wires.
If your home has an AFCI (Arc Fault Circuit Interrupter) or GFCI (Ground Fault Circuit Interrupter) breaker, you’ll also need to disconnect the neutral wire and pigtail from the neutral bus bar. This extra step ensures a complete disconnection of the old breaker and prepares the way for the new one.
Replacing a circuit breaker should only be done by those who understand electrical systems and safety. If you’re not sure, it’s best to get a licensed electrical wiring repairs professional to do the job right and safely.
Following these steps, you can disconnect the old circuit breaker installation guide and prepare for a successful replacement. Stay tuned for the next section, where we’ll cover the steps for installing the new circuit breaker.
Installing the New Circuit Breaker
Replacing a faulty circuit breaker is key to keeping your home’s electrical system safe and efficient. It’s important to install the new breaker correctly for a secure and safe connection. Let’s look at the main steps to install the new circuit breaker right.
Wire Connection Methods
First, make sure the breaker is turned OFF. Then, connect the circuit wire to the “LOAD” or “LOAD POWER” terminal. For AFCI/GFCI breakers, also connect the neutral wire. Place the breaker in the back holder clip and push it forward until it clicks onto the hot bus bar. Fold any extra wire neatly into the panel to keep things tidy.
Proper Positioning Techniques
- Ensure the new breaker is in the OFF position before installation.
- Connect the circuit wire to the appropriate terminal, typically labeled LOAD or LOAD POWER.
- For AFCI/GFCI breakers, connect the neutral wire as well.
- Hook the breaker into the back holder clip and push it forward until it snaps onto the hot bus bar.
- Neatly fold excess wire into the panel to maintain a tidy appearance.
Following these steps, you can install the new circuit breaker correctly in your home’s electrical panel. Always prioritize safety when working with electrical systems. If you’re unsure or uncomfortable, it’s wise to seek help from a licensed circuit breaker installation guide or a professional residential electrical work expert.
Testing the New Installation
Before we power up the new circuit breaker, we need to replace the panel cover securely. This step is crucial for the safety of the electrical system. It also protects the components from damage. Once the cover is in place, we can start the testing process.
First, we’ll turn off all the individual breakers in the panel. Then, we’ll activate the main breaker to bring power back to the system. Next, we’ll turn on each breaker one by one. We’ll test the fixtures and outlets connected to the new circuit breaker’s circuit.
This step helps us make sure the new breaker is working right. It also checks if power has been restored to your home’s affected areas.
If you find any issues or problems during testing, it’s best to call a licensed electrician for a professional check. Troubleshooting electrical issues and ensuring home electrical safety are very important. By following these steps, we can make sure your new circuit breaker installation is working correctly. This gives you the peace of mind you deserve.
Frequent Questions
What are the safety precautions to take when replacing a circuit breaker?
Safety is key when working with electricity. Wear rubber-soled shoes or use a rubber mat for grounding. Use tools with rubber insulation, like screwdrivers and pliers.
Always turn off the main power before starting. Stand to the side when operating breakers to avoid sparks. Keep hands and the work area dry. Have a backup light ready.
What are the signs of a faulty circuit breaker?
Look out for signs like frequent tripping, buzzing sounds, and corroded wires. Flickering lights, burning smells, and hot breakers or outlets are also warning signs. If the breaker is over 25 years old, it might need to be replaced.
Use a multimeter to check if the breaker is working right.
What tools and materials are needed to replace a circuit breaker?
You’ll need rubber-insulated tools, a multimeter, a flashlight, and safety glasses. Make sure the new breaker matches the old one in brand, type, and amperage. Check labels for identification numbers.
Don’t mix breaker types unless it’s approved. You might also need wire nuts and electrical tape.
How do I locate the main circuit panel in my home?
The main circuit panel is usually in basements, garages, utility rooms, or hallways. It might be behind a metal door that matches the wall. Get to know the panel’s layout and labels, which show which areas of the home each breaker serves.
What is the proper power shutdown sequence for replacing a circuit breaker?
Start by turning off all branch circuit breakers. Then, shut off the main breaker. Use a voltage tester to make sure the panel is not getting electricity. This step is very important for safety. Never assume power is off without checking.
How do I remove and install the new circuit breaker?
After making sure power is off, take off the panel cover. Find the faulty breaker and disconnect its wire. Remove the old breaker by unhooking or unscrewing it.
Put the new breaker in the right spot and snap it into place. Reattach the wire to the new breaker, making sure it’s connected right.
How do I safely remove and handle the panel cover?
Start by removing panel cover screws, beginning with the corner screws. Hold the cover while removing the last screws to prevent it from falling. Be careful not to let the cover touch internal parts.
When exposed, handle wires carefully, avoiding contact with other wires or metal parts.
How do I disconnect the old circuit breaker?
Extend the black insulated circuit wire from the panel sides. Grasp the old breaker at its inner center and pivot it out. Unscrew the wire from the breaker terminal.
For 240-volt breakers, disconnect both hot wires. For AFCI or GFCI breakers, also disconnect the neutral wire and pigtail from the neutral bus bar.
How do I install the new circuit breaker?
Make sure the new breaker is in the OFF position before installing. Connect the circuit wire to the appropriate terminal, usually labeled LOAD or LOAD POWER.
For AFCI/GFCI breakers, connect the neutral wire as well. Hook the breaker into the back holder clip and push it forward until it snaps onto the hot bus bar. Fold excess wire neatly into the panel.
How do I test the new circuit breaker installation?
Put the panel cover back on before testing. Turn all individual breakers OFF, then turn on the main breaker. Turn on individual breakers one at a time.
Test fixtures and outlets on the replaced breaker’s circuit to make sure they’re working right. If there are still problems, consider getting a professional to check it.

